Showing posts with label 3mm. Show all posts

Friday, July 7, 2017

The True Story of the Bowling Green Massacre

With a title like that, I'm guaranteed to get tons (and even tonnes) of Google hits... :-)

Anyway, this past long weekend at a family gathering I played another game of Mighty Monsters with my nephew, getting some of the buildings I've used in other games onto the table again, but this time finally glued to their sidewalk bases.  Out for the first time was a new building (the "Time Warp Movie Theatre"), my nuclear reactor cooling towers (eventually to be based), some small-scale felt roads and rivers I've had from Gamecraft for a while, my scratchbuilt forests, and a bunch of scenics and vehicles/figures from my 3mm Vietnam project.

I've also put some more thought into running MM at a convention, so I bought some cheap plastic shot glasses from a dollar store and labelled them for each monster (over 70 glasses!).  If I was smart, I would have bought clear plastic glasses so everyone could see what colours of dice each monster has, but I didn't (and I'm not relabeling 70+ glasses!).  To offset that, but also because I can see a use for them, I'm looking at Litko now about markers and tokens to get for the game.  I also have now printed and laminated my monster sheets, though I may have a few tweaks to make for some of them.

The premise for the game is that the evil and/or alien kaiju have decided to prepare Earth for invasion from space by polluting the environment, including releasing radiation.  So they've come to a certain American city to do so, while heroic monsters and the army have come out to defend the planet.  The scenario takes its basis from the Stomp City Blues scenario in the rulebook, with each building (or block) being worth just half a VP to the bad guys (I had to ban my nephew from blowing up farmhouses - the schoolhouse was the minimum!), the reactors worth one apiece, and if a third went up then the whole plant melted down and a huge swath of land become alien-friendly - an automatic major victory.  For the good guys, only a body count of bad guys could get them VPs.

A long tweet (or game convention blurb) about the subject might just look like this:  Main-stream media won't report it, but through careful digging up of alternative facts, we present you with the mostly true made-up story of the Bowling Green Massacre!  Bad monster hombres, probably coming up through Mexico or blue states have attacked Bowling Green's coal, or maybe nuclear, or one of those powers, plants, bigly!  Only Godzilla can fix things!

My nephew had Destroyah and a Ultraman monster that I call and statted up as the Avatar of the Volcano God, I had an equivalent number of points in Godzilla, Mothra (1960s version), and four tanks and an infantry platoon.

The basic table layout, the nuclear plant and its four cooling towers are in the upper left, surrounded by a 15mm wall (proper chainlink fence still coming). 

Sideview of the table, and my nephew going through the monster cards to pick who he wanted. 

Close up of Bowling Green itself, with my buildings on their new bases, and the round building to the mid-left is the the Time Warp Movie Theatre (it has classic action movie posters up on its walls).

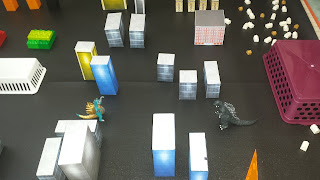
Destroyah flew onto the board, the slower moving (Avatar of the...) Volcano God behind. Destroyah has already done a number on the only working bridge across the river with his Oxygen-Destroyah (area effect) breath.  The schoolhouse is next.

Destroyah keeps flying, for some reason still far away from the nuke plant.  Godzilla and Mothra go out to meet the monsters, the army meanwhile tries to find a good blocking point.  At the bottom you can see my monster dice cups! 

It wasn't intentional, but I really like this and the next shots of Destroyah as a silhouette in the background.  May try to sepia tone this. 

Turns out Destroyah was really on an end-run through the city, destroying buildings with his breath weapon or his fists! 

My nephew knew the Time Warp Movie Theatre was special too me, so he made sure to blow it up! (I still need to make ruined versions of the building bases, so smoke would had to do).  But Mothra has swept in behind Destroyah now!  The Volcano God is still plodding along, he's paused at the river now.

Godzilla had to do a bit of a two-step peek-a-boo game with Destroyah, but now we had him trapped!  Unfortunately on Godzilla's first radioactive breath attack  I rolled a 1, so no more juice until a reactor went up!

I was playing some kaiju music I bought off WarGame Vault or RPGNow (Bailey Records), but here I wish I had the Flight of Valkyries going! 

A close up of Destroyah at NOE height. 

Things are going to hell in a handbasket now in Bowling Green.  Godzilla and Mothra are beating on Destroyah, but the Volcano God's gotten into the city and has the nuclear plant in his (fortunately short-ranged) sights.  The army forces are trying to shoot him, but he is pretty well armoured, and one of the tanks also forgot to bring its ammunition... However, Bowling Green was saved from radioactive disaster when the Volcano God's first (and only) shot at the cooling tower missed.  And then...

Big G showed up to fight him.  Meanwhile Mothra had released a poison gas cloud that was putting some hurt on Destroyah.  For some reason in his next turn my nephew decided to try to activate the Volcano God first AND chose to roll three dice, getting three failures, so Destroyah was stuck in the poisonous cloud of moth wing dust for another turn.

At that point though real life intervened - we'd played this over two mornings, avoiding my younger (2yo) nephews and their real life monster rampages, and it was a nice weekend so we packed up and spent the rest of it outside, doing proper summery things.

All told, I hadn't killed any monsters, so no VP for me; Destroyah was Stunned, almost Wounded, but nowhere near deaded.  I'd only taken one Wound for Mothra's use of the poisonous cloud.  Theo, however, had 3 VP for all of his rampaging destruction, so a Minor Victory to him. Again!


Wednesday, January 4, 2017

Dollar Store 3D Landmarks - Completed

Well I spent an hour or so last night putting together the 3D puzzles from the dollar store (see previous post) that I wanted for my own kaiju gaming:
They went together pretty well, except for the Petronas Twin Towers, which are going to require some gluing because of the way they are packaged (the tall towers are folded in half in the packaging and come out...a bit limp).

The rest work, most are closer to 1/1200or smaller (way smaller in the case of Petronas and the other tower), but a couple are probably near spot-on 1/600 (or 3mm).

So I got 10 models out of the deal, my nephew will get 10 for his gaming.

Tuesday, January 3, 2017

Dollar Store Find - Cheap 3D Landmarks


I was in a local dollar store (Dollarama in Canada) searching for some cheap plastic hand soap dishes to use as the top cover for an underground giant monster prison (that makes perfect sense to me!), when I came across a rack of cheap (pack of 2 for $1) 3D puzzles of famous landmarks.  I bought them all - really, every one, even the doubles - right away!

Here they are spread out:
It's hard to tell what scale they are until I put them together, but I'm guessing most range somewhere along the 1/300 (6mm) to 1/600 (3mm) to 1/900-1/1200 (2mm/aeronef) continuum, though the windmill seems like it may be large.

They are definitely at the low-end of the 3D puzzle (never mind wargames terrain) quality scale, but I see two uses for them;

1) A quick and dirty way to add a landmark to a city for kaiju (giant monster) gaming.  I have Tokyo, New York, Toronto, and a generic Monster City layouts in development using higher end 3D puzzles and other trinkets as landmarks and cardstock buildings for the rest, but by dropping one of these on a table with some generic buildings gives me Moscow, Barcelona, Istanbul, Beijing, Kuala Lumpur, etc.  Great for a worldwide kaiju campaign (or recreating Destroy All Monsters or Final Wars)!

2) Giving away to my nephew for his kaiju gaming/playing.  He has a city board I made of foamboard and spare foam cutouts, and now I'll give him whatever doesn't work for me (he's scale immune - action figures and 3" Godzillas on the same table are fair game) and all of the doubles I picked up.

And ironically, I couldn't find the soap dishes!  I did find some crystalline space monsters and a space station disguised as Xmas decorations though, as well as the big find above.

FYI, there isn't any brand name on the puzzles, just Made in China and $1!

Friday, September 30, 2016

Quick Kaiju City for My Nephew

My nephew and fellow giant monster movie fan, Theo, has a birthday this weekend, and a few of the things he's getting from me are some 3" gashapon monsters - "Godzilla Raids Again" Godzilla (aka the one with the fangs), 1990s Godzilla, and 1970s Mechagodzilla.  He already has Godzilla 2014 and one or two of the MUTOs, and has played Mighty Monsters with me a few times with my stash and in-progress city terrain.

So to compliment his toys, and give him something to practice his gaming with (he likes to make up his own rules for games, always to his own benefit), I quickly put together this table for him last night:

The base is just black foamboard, and the buildings are cut-outs from some Figures in Comfort transportation cases I got a few weeks ago.  Conveniently enough, the cut-outs all have peel-away sticker on the bottom of them, which made this pretty easy to put together.  There's space on the left for his own buildings or other terrain, and the streets are wide enough for the figures (and their tails!), and should be pretty indestructible, even if his younger brother gets ahold of it!

Wednesday, February 24, 2016

8th Wonder of the World, 1st Wonder of my Games Room

So I like Gamera - a lot.  I like Godzilla - a lot - and I consider the first Godzilla movie to be a classic. But my first and truest monster love will always be King Kong, and after some searching and a lucky find on eBay, not only did I get one for my 3" kaiju collection but he fits even better than I'd hoped.

Some researched showed me Konami had made a series of 3" 1933 retrospective figures as part of the 2005 King Kong release, and one of those was Kong on Skull Island, with a couple of hand options, either holding Ann Darrow or holding a big branch, mounted on a base with the dead tree he puts Ann in while he fights off the T-Rex.

The size fits my monster collection - although in the original movie Kong was at most supposed to be about 24' high, not the 150' he needs to be to fit in with Big G - but nothing else (other than the flying monsters) I have is based, and a 15mm Ann Darrow in hand wouldn't fit in with my 3mm infantry and tanks! So I was going to go with the branch-holding hand and hope for the best with regards the base.

I found a seller on eBay in China who had four of these left for sale, and I placed an order, and in a super-quick 10 days from China to Canada my Kong arrived Monday:
Here he is, looking as awesome as awesome can be (the figures are intentionally painted in glorious Black & White), and able to stand without a base!  And the Ann Darrow hand turned out to just hold her by his grip (not a peg and slot like I'd feared) so I'm able to use that instead of the one with the branch. Perfect!

Here he is with his favourite movie prop:
 And facing off against his main challenger for King of the World:
 King of the Monsters vs. King of the Beasts!
On the same day I went looking for another St. Peter's Basilica 3D puzzle (for reasons discussed in my last post) in a local dollar store, and found a bunch of nicely sized dinosaurs.  Here's KK vs. a T-Rex, they match nicely at the 1933 movie scale!
More on the dinosaurs in my next post, you can see them off to the side or in the background of some of these pictures.  While they will work, there are some scaling compatibility issues with them that I'll need to sort out.  I have some bigger Safari ones for 28mm, and I was hoping these new ones will work for 15mm - they will, but not necessarily with each other!

For the Mighty Monster rules I wanted to beef up the "Giant Gorilla" listed at the back, as that rating was 180 points less than Godzilla, making it nearly impossible for Kong to face off against Big G and at a disadvantage against many of the other monsters I've statted up. Fortunately the ratings how-to in the book had some other suggestions specific to a giant gorilla and I'd just watched the 1933 movie again recently, so here's how I have him now:

Name: King Kong, 8th Wonder of the World  
Point Value: 375

Head: Q = 3   C = 2  Fangs, Intimidation
Body: Q = 3   C = 4
Arms: Q = 3   C = 4
Legs : Q = 3   C = 3

Other Special Rules:
1.  Massive
2.  Bellowing
3.  Grappler
4.  Charge
5.  Berserker
6.  Very Tough


Monday, February 22, 2016

First We Take Manhattan

I previewed one piece of this in last week's post, so today I have some more of my Manhattan Island project for giant monster gaming with Mighty Monsters and 3" gashapon figures.  I've picked most of these up in the last few months, the Manhattan-specific stuff from eBay and the other landmarks at a dollar store in the toy section.

When you think of monsters in New York, the Empire State Building is of course #1, so that was my first goal, and a 3D puzzle from China solved that.  From the same source I also got a Chrysler Building 3D puzzle, but now face the slight problem that the Chrysler Building is taller than the ESB! So I'm going to have to make sure I separate the two a bit when I put Manhattan Island together, making sure the ESB is more front-stage.

I didn't want to involve the World Trade Centre buildings with any gaming, so I'm going with a pre-1970 New York, leaving the next landmark in my mind as the Statue of Liberty.  There was another Chinese seller with a perfectly scaled (for 1/600) fake brass statuette on eBay, the entire thing being about 6" high (the real Statue and base is about 300').  Both the ESB and Chrysler Building are somewhere around 1/2000 or 1/2400, but still way taller than my paper city buildings from Germy and cut-down 6mm files.

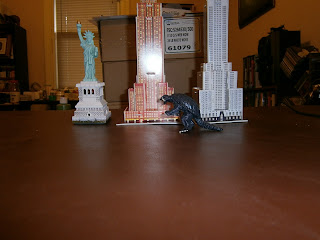
With that pre-amble, here they are, with Gamera helping by providing a reference size:
The view from the ground:
Some individual shots of the 3D puzzles:

I discovered a bit of an issue with the ESB when I pulled it out for this photo shoot - some of the paper is peeling away from the foam on the base and it's developed a bit of a warp, but some Aileen's Tacky Glue solved the former, and some coffee stir sticks glued under the base solved the latter.  The base for both is about 1-2mm in the air because tabs are projecting through, but most of my buildings are going onto tiles that will be the sidewalks, so I'll fill in the resulting gap when I get the buildings glued to the tiles.

As I mentioned above, the Statue of Liberty is a fake-brass thingy, so I had to paint it up, coating it first with white gesso.  I'm also going to have to build a proper fort-like base for it, around the lowest (and unpainted in the photos above) level, so the arched doors open onto the roof of that base.  But that's for another day (I haven't really thought that through yet).

But here are some pics of the SoL as a work-in-progress:
On the top is the original statuette, out of the box, and below is after the gesso and gesso+brown paint was added.

Close up of the final product (barring the base):

A couple of other 3D puzzles I picked up in early January in a dollar store are a near-1/600 scale Notre Dame cathedral and a 1/1000 or so St. Peter's Basilica.  They don't work right beside each other, and Notre Dame doesn't work right beside the ESB and Chrysler Buildings, but with several blocks of other buildings between them, I think they'll do ok.  Most of the buildings from Germy helpfully lack real scale benchmarks, so if you look at Notre Dame and then scan over to the ESB, you will hopefully sort of ignore the difference.

I figure Notre Dame will fill in for one of the big NY cathedrals, St. Patrick's or St. John the Unfinished (which would actually be off-map - see below), the height is right for one and the footprint for the other. St. Peter's could do double duty as a fancy European state building, university campus, or palace.  You can build it without the keyhole-shaped forecourt too, which will make it an alternate church too by disguising its origins somewhat.  It was a pain to put together (lots of swearing) but looks ok for what it is now.


To wrap up the pictorial portion of this entry, here's a WIP shot of the tiles that will base my monster city buildings.  These are test subjects, of a few tile types and how they take cheaper Bob Ross grey gesso (I save the Liquidtex grey gesso - impossible to find here now - for figures).  I found the cheap dollar store tiles actually seem to be best. They aren't super solid support for the buildings (they're a bit bendy) but to date THEY DON'T WARP!  The thicker stuff (a couple pieces pictured here) warps a little and is really thick; I have some mid-thickness stuff from Home Depot that cost more than the dollar store stuff and it warps.  I have some pending 3mm rice paddy shapes in this Home Depot stuff cut out that have been under about 100lbs of pressure for a couple of years and they still want to warp whenever I let them come out for air (and I haven't painted or based them at all, just cut them out!).

Anyway, the cheapest stuff seems to work.  These are 4" square bases, except for the unpainted 4x8" piece of the thickest stuff.

More to come on these, I still have lots of buildings to cut out and build yet (and more to print).  Most tiles will be 4x4, some will be 4x3, others 4x5 or 6, and yet others will be custom sizes for the type of city block I'm building.  Central Park will probably be 8x8", representing only a portion of the park at the edge of my Manhattan.

Which leads me to what I'm trying to do with Manhattan map - it's going to be a fairly (fairly = highly) stylized representation of the island and part of the river, probably a total of about 7.5' long by 3' wide.  I may make it a bit wider or longer by showing more river, but at its thickest the island will be 3' wide.  So at one end I'll have 18" (maybe 36") of open water, representing the SW approach to the island, with the Statue of Liberty Island at one edge, and Governors and Ellis Islands making appearances.

Then there will be a 18x36" strip of water (representing the Hudson River to the west of the island) and an 18x36" strip of city - the financial district more or less, up to Chelsea.  Lower east side won't be mapped, the Brooklyn Bridge will be partially on the table (using a generic bridge from Shapeways that I'm working on).

Then there'll be a 36x36" section of city, Chelsea to say 1/3 of Central Park - call East 72nd Street the edge of the set-up.

So I hope that'll give me some water for approaching monsters to use before they get to the city, and lots of colour for the eventual fight in the city.  It all looks beautiful in my head.

I also have a 25" (!) Tokyo Tower 3D puzzle to put together, and in the mail is a double feature CN Tower + Skydome (aka Rogers Centre), so my kaiju are going to be able to threaten Tokyo (of course) and Toronto as well as Manhattan and assorted generic cities.

But I ain't building Berlin.

Wednesday, February 17, 2016

Giant Monster Dance

This past weekend was a long weekend here in Ontario, and through some minor scheduling miracles, the entire clan was able to gather at my mother's - three brothers, two sisters-in-law, and three nephews, two of whom had had their first birthdays in the last couple of weeks. So it was a good family weekend, and as an added bonus, on Sunday my 5yo nephew and I got in a couple of games of Mighty Monsters by Ganesha Games.

Theo's keen on giant monster movies, aided by uh, one of his uncles. So much so that when I arrived Saturday morning, I learned he'd been bet that he couldn't go the entire day without saying "Godzilla".  He lost about five minutes after my arrival, and got served dessert last that dinner.  He loves to look at my 3" gashapon collection and was interested in playing a game, although I don't think he really understood at the beginning what I meant by "game", versus say bashing toys together to see who wins.

However, I started by going over four basic rules we would follow for any games we play with my "toys":
  1. Clean hands.
  2. Be gentle with the "toys".
  3. Follow the rules of the game.
  4. Be a good sport (he's thrown the occasional temper tantrum during games of Double Trouble).
He thought those were good rules, so we set up my black vinyl matting that I'm going to use as the streets for my monster cities.  One interesting thing I learned was that I'd somehow assumed these were 18" by 36", so using two would give me a 36x36" footprint.  Instead these are about 45" long, so I'll either roll with that or chop these down to 36", or do both (I have four in black, four in gray).  I need 36" whenever they're going to be lined up with my 36" square blue felt mats for water.

I then set up what cardboard buildings I had ready, which isn't yet enough to fill the mat - they also haven't been based on gray tile to form blocks.  We filled in the mat with overturned baskets, Duplo blocks, and other toys.  I also had my unpainted Monopoly buildings with me, so Theo built the suburbs with them.

From there we picked monsters and went at it.  Theo of course went with Big G, and I took classic Gigan.  This was my first time with the rules, but things went pretty smoothly - there were a few errors, but nothing that affected the result, and I think Theo got the most breaks. He generally was able to play along, he was doing his own adding and making his own choices.  I gave him the proper set of Godzilla ratings, rather than a simplified version as suggested by the rules, and it wasn't a problem.  

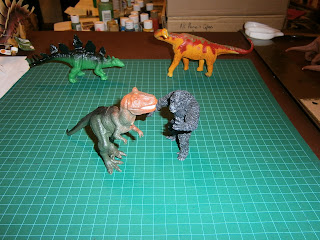
Anyway, so here's a shot of Gigan and Godzilla finally facing off, after taking a few pot shots at each other as they danced towards the middle of the city:
(as always, clicking on the photo brings up a larger version)

Godzilla lay a pretty good beating on Gigan - Theo was rolling well, plus Godzilla is a 450pt beast vs. Gigan's 395.  I finally realized playing the long distance game with Godzilla wasn't going to work, so I closed and tried to go for a grapple to bring my belly saw into play:

I finally got the grapple on, but my free hack at Godzilla with the belly saw failed, and when I tried to activate my head (with two yellow and one red dice), I rolled a one on a yellow and failed on the red, leading to two critical rolls.  Whereupon I rolled a Knockdown, and then a Knockdown, which becomes a Knockout.  So game over for Gigan!  

I'm not entirely sure if you're supposed to only roll once even if your dice roll says twice, so maybe I would have survived another turn, but I was pretty much at the mercy of Godzilla at that point.

Theo then found the Final Wars version of Gigan in my collection, and for game two he went with the original version of Gigan from that movie (the one with the blades for hands, not the chainsaws), and I took modern Gamera.  Both were 450 point monsters, so in theory a fair fight.  

Gigan tried to get a bit cute though, and Gamera was able to track him down and get in hits with both his fiery breath and his plasma chest burst (which I later decided should be a one-shot weapon).  The game was running late and we were supposed to watch a Gamera movie later in the afternoon, so we called it a day on the gaming front with a victory for the great turtle.  Theo's attention was also starting to wander - I suspect he wasn't keen on being on the losing end.    

We went on to watch Gamera - Attack of Legion, his first Gamera movie, and he loved it even though he couldn't keep up with the subtitles.  He asked later to play more Mighty Monsters the next time we're together, and from my list of potential games, also some fantasy (he's painting some Reaper Bones goblins and ogres), using Songs of Blades and Heroes.  He was intrigued that it used similar rules to Mighty Monsters, though when he asked what the difference was, for some reason I missed the obvious - that you don't have to roll for each body party.  

Next I hope to post some photos of other scenery I'm working on for Mighty Monsters, including some useful 3D puzzles and other trinkets from eBay.  Here's a teaser...


Monday, July 22, 2013

3 & 6mm Paintjobs in Progress

Hehehe, I said "paintjobs".  Here are some of the things currently on painting table #2 now that the big German factory is finished (pictures to come).  First up are some 3mm wood churches for Terrible Sharp Sword ACW gaming, the miniatures are from Bay Area Dockyards:

 Most of the painting is don, now I'm in the touch-up cycle, correcting all my mistakes from the first pass!  The pieces are ok, these ones didn't need any fixing, I have a lot of other Bay Area Dockyards that need sanding after I patched some pitting in the resin.  Not tragic problems, but two extra steps in the process.

Next up is a 6mm bridge from what used to be Simply Six - I think Picoarmor carries the range in the US (at least he carries the 3mm stuff from Simply Six).  This is actually DONE!  Yes, believe it folks!  It just needs sealing:

It's a really nice piece, none of the Simply Six stuff ever needed fixing, just a wash and straight to painting.

These 6mm ruins are also from Simply Six:
These are still a work in progress, I usually dabble with them when I paint left over from one of the other pieces, I add a bit to the rubble piles, and now just need to focus on finishing them with some grays and browns.

Finally, here's the Stalingrad Grain Elevators in 6mm from JR Miniatures:
The bulk of the painting is done, just have to do the gravel on the roof, drybrush the green and blue roofing, and do the metal tanks and pipes (and latticework on the one side). 

Sunday, November 18, 2012

Let's Walla-Walla Down By The Rubber Trees

Thanks to the movie Meatballs for the title.  This is way late, but here's how I am putting together some rubber trees for rubber plantations in 3mm Vietnam-land.  They'll also work for peach orchards and the like in Terrible Sharp Sword (ACW) and Sharp Practice (Nap) games.

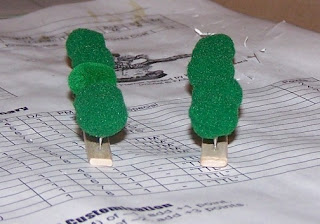
First up is the parts - dollar store (on left) and craft store (on right) mini pom-poms, the cheap dollar store ones are actually better in the long run - easier to paint and some of the colours can be used without any painting.  I also use 13mm pins, inserted through the pom-poms, as in the three examples out of the bag in the pic, and some craft store wood sticks.  I used an awl to poke some holes in the wood sticks, for sticking in the trees later.
As I said, some of the pom-poms didn't need any paint touch ups, but a lot did, so I used some basic green craft paint (Hunter Green) to touch them up.  The pic below isn't the finished pick, but "in progress".  The pom-poms absorb a lot of paint, so it's a bit of a bugger, but it worked in the end.
Below are pics of the trees once I glued them into the craft sticks.  There isn't much depth to the holes, so it took a bit of work, but it came together.  Now I just need to add sand and paint the sticks, and the trunks.

Friday, June 22, 2012

Grass Huts Progress

Following some advice on the 3mm Yahoo group, I tried using some Polyfilla to create some grass hut-like texture on my Monopoly building village huts, and here are the results:

These are the regular village huts. I have some round huts I did a while ago from wooden plugs and things, but didn't texture - I think I might need to revisit them now, these look pretty good! Hopefully the turn out ok after sanding a bit and painting.

 
Some of the bigger buildings, and the chieftain's hut from the Montagnard village on stilts. In the background are buildings that will be used for cities and towns in Vietnam.


More from the Montagnard village. I just did the roofs, since from my pictures, it doesn't look like the walls were as obviously grassy, so I'll paint those gray-brown to represent flat wooden walls.

However, now I'm hungry, since all that texturing just makes me think of...

Wednesday, June 20, 2012

More Vietnam

A quick photo of my Vietnam NVA dug-out bunkers (WIP), termite mounds, foxholes, and US sandbagged bunkers. The one US bunker (centre-left) has a rader dish on it (from a Shapeways bits pack), and I'll try some pins for regular radio antennae. Clicking on the pic for a close-up is probably the best way to see things.